Why Does a Furnace Cost So Much?
Many people ask us why a furnace costs so much. According to Forbes, installing a furnace costs $4,700 on average (in 2023 dollars), but you could spend less or as much as $10,000 depending on the type of appliance.¹ It’s important to realize a furnace is a long-term investment. It can last for 15 years, but if you’re diligent enough with scheduling maintenance and heating services, a 20-year-old furnace isn’t unheard of. But what makes the upfront costs of furnace installation so expensive?
Here’s a look at why a furnace is often such a big investment.
Heating Company Profit
The upfront cost is less dramatic when the longevity of the equipment is considered. However, companies that sell furnaces don’t benefit as much. That’s because they must wait longer before you need a new one, and they sell only a few furnaces over any given time. Selling furnaces that last is good for a company’s reputation. But it must earn as much as possible on each sale. Therefore, high selling prices can be hard to avoid.
Furnaces Are Complex
A furnace is a complex assembly of parts and components. Each one has differences and every home has unique installation requirements. There may also be space constraints and gas, electrical, or ventilation upgrades to make.
The type of furnace matters, too. An electric furnace costs from $2,000 to $7,000; operating it requires paying high electricity prices each month. Furnaces use a lot of electricity. However, a natural gas furnace can cost $3,800 to $10,000 to install, while natural gas is generally cheaper than electricity, especially in very cold climates. An oil furnace requires paying high oil costs over its life (on top of a $6,750 to $10,000+ installation price), but usually lasts longer than a gas furnace and is safer to operate.¹
Furnace Cost Increases with Equipment Size
The size of a furnace is measured in British Thermal Units (BTUs). To determine the number of BTUs needed, a contractor will factor in your home’s square footage and a few other variables. The square footage is multiplied by 40, meaning a 2,000-square-foot home requires about an 80,000 BTU furnace (more if your area has colder winters). A 40,000 to 60,000 BTU system will cost $2,000 to $3,000. Higher capacity units are costlier to install, as are those for homes that are drafty or have higher ceilings.¹
Safety Concerns
Furnace installation requires a great deal of expertise. It can be dangerous because a contractor may have to work with gas connections, which can lead to exposure to harmful fumes, chemicals, or carbon monoxide. Therefore, they must be attentive when testing connections and setting up the appliance and its ventilation. Improper testing can lead to furnace damage or an explosion.
A knowledgeable and well-equipped technician won’t miss any details and will ensure your furnace will work correctly. Nonetheless, you’re paying for their expertise. This includes the cost of education, training, and licensure as well as their health insurance (policies can be quite expensive for technicians who work with large appliances). Even if the contractor is insured through their employer, insurance costs will indirectly influence furnace costs.
Installation Entails More than Just the Furnace
For a gas-powered furnace, a contractor must set up a gas connection and vent. Installing an electric furnace requires running wiring, adding a circuit breaker, or perhaps updating an electrical panel. Holes are often drilled for pipes and wires. The technician must also transport the furnace and move it to the proper location, which can be difficult depending on the space available and if the unit is placed downstairs. Installing a furnace also takes several hours; it’s not a quick process.
Other Cost Factors When Installing a Furnace
The furnace cost you pay also depends on:
- Efficiency: High-efficiency furnaces cost more upfront to install, as they’re more complicated and use higher-quality parts. Designing and building such a furnace is an investment for manufacturers, which pass on the cost to installers. As more efficient units become increasingly popular, the supply of cheaper, less efficient furnaces is decreasing, so even their prices are going up.
- Cost of Materials: Furnace parts are expensive to make. The cost of materials used to produce them can fluctuate, especially when there are shortages. Finding skilled labor is also an issue. Assembling the components takes time and requires specialized skills, but many are small and break easily if not handled correctly. If a part breaks, rework adds to the cost of production.
- Brand: A lack of competition often affects furnace prices. Local companies may work with only certain brands, or the company may operate within a limited radius to save on travel costs. The appliance brand has a big influence on cost; some brands are known for lower prices, but other well-known luxury brands are on the higher end of the price scale.
Financing a furnace is another cost consideration. It can make installation more affordable. If the contractor finances the unit, you may pay little or no interest. But if it works with a partner, the lender will charge interest and you could pay much more for the furnace than the initial cost of installation.
Is the Furnace Cost Worth It?
Installing a furnace of the same type costs less than converting from one furnace to another, which may also require moving the location of the unit or modifying or replacing ductwork. In any case, installing a furnace can improve energy efficiency and indoor air quality, so you not only save on utilities but breathe cleaner air. Financing, rebates, and tax credits can make installation more affordable.
People often think they can save with a DIY furnace installation. It can avoid paying for labor but requires working with complex tools and equipment, not to mention dangerous elements such as gas lines. You might require a technician after all, especially when a mistake requires costly repairs. A DIY installation can also void the warranty, as furnace warranties often require hiring a professional for installation.
Hire NexGen for Heater Installation
At NexGen, we install and replace gas, oil, and electric furnaces in Southern California. Our licensed technicians install each unit correctly and ensure it runs reliably and efficiently. Safety is our top priority. We’re also committed to helping you afford the furnace cost when it’s time for a replacement. Our in-house financing includes low-interest rates and affordable monthly payments for new units and major repairs. Apply for financing or request a quote by calling (805) 301-6788 today.
Source:
The Tankless Water Heater Installation Process
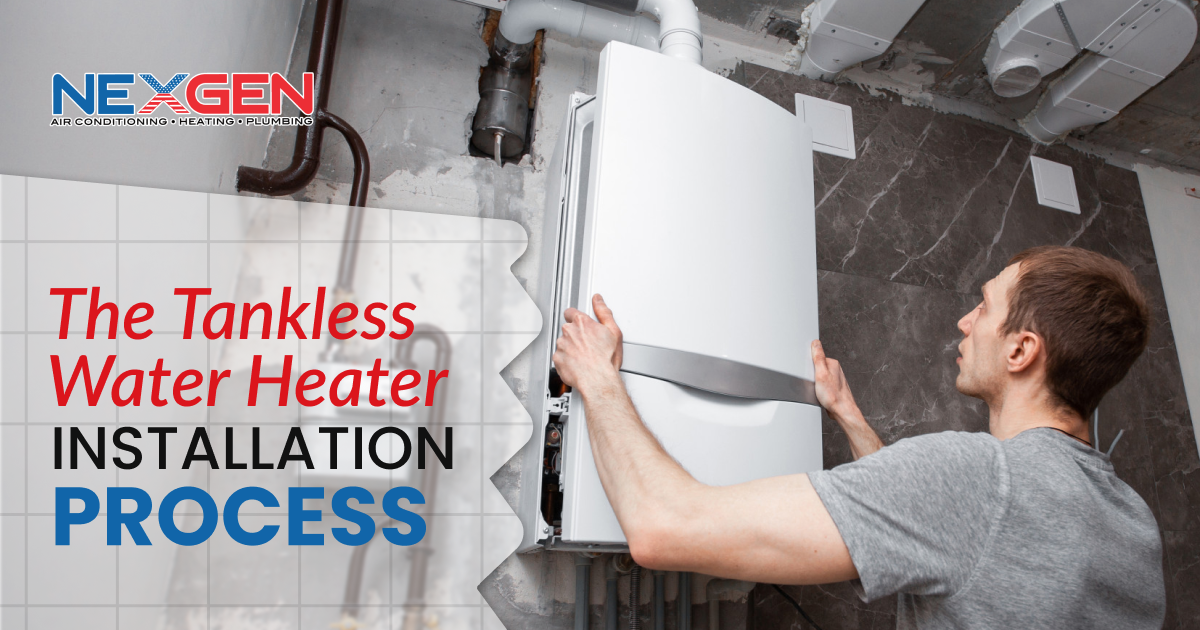
It’s best to leave tankless water heater installation to a professional. The process is too complex for a DIYer. While tankless units are smaller and more straightforward than traditional tank-based water heaters, they require precise connections. Any mistakes can reduce efficiency and put your safety at risk.
NexGen specializes in water heater repair and installation. If you’ve never had a tankless water heater installed, here’s a look at how the installation process works:
Preparation
Plumbing, gas, electrical, and vent work may be required before disconnecting your old water heater. Assuming you’re installing a gas unit, the gas meter may be upgraded, especially if your existing one doesn’t have enough capacity to supply the tankless water heater and all your other gas appliances. A tank water heater may use 30K British Thermal Units (BTUs) per hour while a tankless system may require 90K to 130K BTU/H.
Your local gas company can check the meter to determine if any updates are needed.
You’ll also need a professional to run a 1-inch gas pipe from the meter to the water heater, along with another gas shutoff valve. A stainless steel exhaust pipe is installed. It includes a fan that pushes out air and condensation. High-efficiency units can be served by a plastic pipe. If you live in a colder climate, installing a damper protects the system from cold air.
Electrical work may be necessary as well. Gas units use 120 V electrical power and need a dedicated outlet or junction box. However, an electric water heater requires a 240 V circuit along with a subpanel (plus wiring between the two).
Remove the Old Water Heater
Before removing the water heater, the water supply and gas lines are turned off. The water is also drained from the tank. A heat-rated hose is used to drain the system (a typical garden hose will be damaged). Opening a hot water faucet releases pressure. Once the tank is drained, the water and gas lines are disconnected, which typically requires a pipe wrench or channel-type pliers. The unit is then disposed of per local codes and regulations.
Set Up the Pipes
A location is chosen for tankless water heater installation. The technician drills a hole in an outside wall close to the water heater. Through here, PVC pipes for the fresh air intake and vent are inserted. A traditional chimney won’t be effective because the flue gas temperatures on a tankless system are too low. Instead, the system can be vented through a rim joist.
The contractor taps into an existing tee if your gas line is the proper size and the unit is being installed where your old water heater was. A gas shutoff valve, tee, and sediment trap are installed. A flexible line is run from the tee to where it can be attached to the unit.
Copper pipe is used for connecting new hot and cold water lines to existing plumbing. The new lines are run to the new water heater and cut and soldered as needed. The copper lines may also need to be deburred and sweated; the plumber will secure the pipe to the wall with bell hangers. An expansion tank may be installed near the cold intake.
Mount the Tankless Water Heater
When installing a tankless unit, the contractor can set it flush against the drywall or plaster. It can also be set into the wall between studs. The unit is mounted according to the manufacturer’s instructions. Water supply and outlet pipes are routed and connected to it and shutoff valves are installed on both lines nearby. Inlet and outlet connections are finalized with union fittings.
To set up the water heater, water valves, and faucets are opened. The electricity and gas are not yet turned on. Water is allowed to run through the unit for a minute or so and then turned off (to purge air from the water pipes and heater). The inline filter is removed, debris is cleaned out, and then the filter is replaced, water valves are opened, and power and gas are restored. The technician then tests the unit to ensure proper operation.
Install System Valves
During installation, a pressure relief valve is installed. It’s a safety device that opens if system pressure is too high (often due to overheated water). A purge valve is also installed to simplify maintenance. In addition, the plumber can install a crossover valve at the furthest plumbing fixture, which allows a recirculation pump to deliver hot water.
Why Do I Need a Plumber for Tankless Water Heater Installation
Whether you’re upgrading from a traditional unit or replacing a tankless water heater with a new one, extensive water and gas line work is required. There are many safety hazards associated with installing gas and electric water heaters. A licensed plumber knows how to address these and meet permit requirements, comply with code regulations, and satisfy the terms of the warranty.
Most importantly, they can avoid damage to the equipment and your home. There are also rules for the removal and disposal of old water heaters, which a professional plumber is familiar with. They ensure your old system is taken away safely without violating any regulations.
Contact NexGen
NexGen is trusted for tankless water heater installation and replacement throughout Southern California. Our technicians are fully licensed and insured. They’ll help determine the best model to install, provide a free estimate, and discuss your financing options. We also offer competitive pricing and a price match guarantee, which can help manage installation/replacement costs (these can be offset by increased efficiency and lower maintenance requirements). For more information, call (805) 301-6788 today.
10 Reasons to Have a Sewer Line Cleanout Installed
Installing a sewer line cleanout has many benefits when it comes to unclogging or maintaining sewer pipes. You need one if it’s not already installed. Sewer line clogs are often hard to locate and can be too deep for a plumbing snake to reach or for the force of a plunger to have any effect.
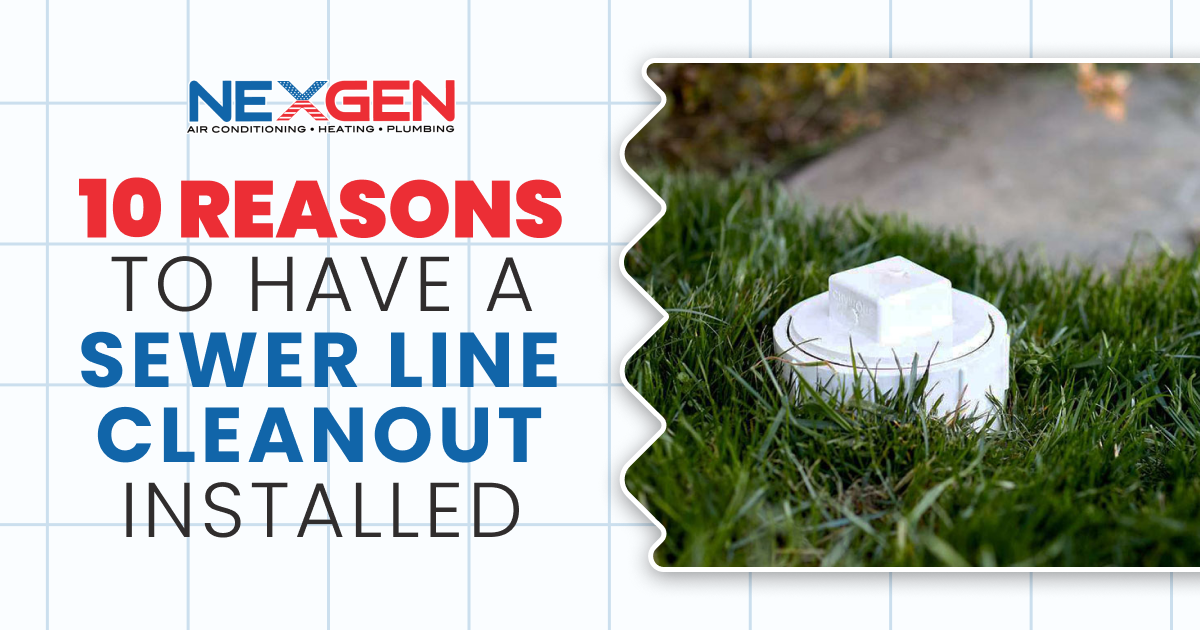
The cleanout is usually a 3-, 4-, or 6-inch pipe covered with a white, black, or gold plastic cap. It provides access to the sewer line at a connecting point between your house and the municipal sewer system. Usually found outside the home, it’s often near a basement window, in the yard, along a sidewalk, or where the pavement and lawn meet. An older home may have a cleanout inside.
You should have a sewer line cleanout for these reasons:
1. Emergency Access
A blockage or broken pipe can cause sewage to back up and flow into your home. The longer this takes to resolve, the more expensive repairs will be. A cleanout provides a plumber with immediate access to the sewer line and a closer point where they can reach and remove a blockage. They won’t have to excavate your yard to access the pipe.
2. Drain Problems Can Be Prevented
If you often deal with clogged drains, a sewer line cleanout enables a plumber to quickly detect where the problem is and address it more quickly. They can perform a better assessment and provide advice on how to prevent future drainage issues.
3. It Can Improve Safety
Sewer gas is toxic and can be extremely harmful. The cap on a cleanout prevents gases from building up and entering your home. Otherwise, they could seep through pipes, floors, and baseboards. Aside from smelling unpleasant, gases such as ammonia, methane, and sulfur dioxide can cause headaches, dizziness, eye irritation, nausea, vomiting, sore throat, and difficulty breathing; if the concentrations are high enough, you could quickly be rendered unconscious.
4. Your Plumbing Is Draining Slowly
Multiple slow or clogged drains point to a sewer line clog. If this is the case, sinks and toilets will be affected. Even if they’re draining slowly, a sewer line cleanout can enable a plumber to act quickly and avoid a complete blockage.
5. Water Is Backing Up Unexpectedly
A clogged toilet or shower will prevent water from draining from one location. But issues such as water appearing in a downstairs shower when you flush an upstairs toilet mean water is moving but not going as far as it’s supposed to. The backup is originating further down the line. The easiest place to determine where is from the cleanout.
6. Your Plumbing Can’t Handle Large Amounts of Water
Running a sink or flushing a toilet may not cause trouble. But if you run multiple fixtures or a large washing machine load, and a backup occurs, don’t ignore the issue. You may just be tempted to reduce the load on the system. A sewer line clog will only get worse, and installing a cleanout can help manage it.
7. The Yard Is Flooding
The pressure from a blockage can cause the main sewer line to break. Water will then emerge outside. If this happens, your yard may appear damp even if it doesn’t rain. Lush patches of greenery can also mean sewage is leaking. The closer a plumber can get to the problem, the more quickly they can resolve it.
8. Mold and Mildew Are Growing In Your Home
Water can back up into your home and not cause plumbing problems. However, excess moisture can allow mold and mildew to grow. If left unchecked, they can do extensive damage, including the foundation, and cause health issues. When you see mold growing, call a plumber to find out why.
9. Flooding Can Be Avoided
A single flood, even if the water doesn’t get that high, can ruin furniture, carpets, flooring, and building materials. The small blockage growing in your sewer line can be a precursor to a flood. With a sewer cleanout, a professional can reach the affected area and fix the problem before it becomes a disaster.
10. Plumbers Can Perform Routine Maintenance
Aside from dealing with emergencies, a sewer line cleanout makes it easier for a plumber to perform an annual sewer cleaning. They don’t even have to enter your home. Plumbing maintenance can address issues and prevent future clogs.
Call NexGen to Install a Sewer Line Cleanout
Installing a sewer line cleanout makes plumbing repairs and maintenance faster and more convenient. We can use this access point to conduct camera inspections, snake a sewer line, or perform hydrojetting. At NexGen, our technicians are trained in various methods of unclogging and cleaning sewer lines and can address tree root infiltration and other issues. To schedule drain and sewer line cleaning and other services, book your appointment online or call (833) 729-9735.
Tankless Water Heater Repair vs. Replacement
In many cases, tankless water heater repair can resolve an equipment problem. However, replacing the unit may be the better solution, depending on the issue and age of the system. NexGen is a leading provider of tankless water heater services in Southern California. Using our knowledge and expertise, we’ll help you weigh the decision to repair or replace a tankless system by considering the following questions.
How Old Is Your Water Heater?
Tankless water heaters can last 20 years or more. But should you use one until its very last breath? This often requires spending money on repairs that can go towards purchasing a new unit.
While some repairs aren’t that expensive, there are a few considerations. For example, if comparable models are more efficient or the warranty has expired, investing in a new model can save you in the long run. Replacement is often discussed when an older model requires a major repair.
What Will Repairing the Unit Cost?
The cost of repairs is a big factor, especially if the water heater was recently fixed and is likely to need additional service soon. Generally, if a repair is more than 50% of the cost of installing a new tankless water heater, consider replacing it. If a repair estimate is less than that, repairing the unit can be cost-effective if it doesn’t break down frequently or requires multiple repairs.
When Was the Last Repair?
When one part goes bad, other parts may be affected. Therefore, the unit may work less effectively even after being fixed. You may need to schedule tankless water heater repair every few months, which is costlier than taking advantage of the latest technology that can improve efficiency even more than your existing heater did when new.
Is the System Serving Its Purpose?
If the answer is no, you’ll benefit by replacing your tankless water heater rather than repairing it. Signs you need a new one include water not being warm enough, hot water running out quickly, or the unit not keeping up with demand (especially when two or more fixtures are used simultaneously).
Is the Unit Working Properly?
If there are signs something is wrong with your tankless water heater, consult a professional to weigh a repair vs. replacement decision. A noisy unit can mean there’s excessive sediment buildup or a potential mechanical failure. The most concerning noises include banging, popping, crackling, and hissing. Repairing the system may be possible if it’s serviced in time and maintained properly, but there’s always a concern that one faulty component can cause others to fail.
How Is the Water Quality?
Unless an issue with your local water supply is causing water to have a poor taste, foul odor, or cloudy or rusty appearance, the problem is likely with your water heater. Tankless water heater repair may be an option. But if the unit is severely worn or corroded, replacement is the better solution.
How Efficient Is Your Water Heater?
Any water heater that’s wasting energy should be replaced, especially since repairs can be expensive. Look for issues impacting efficiency, such as a leaky tank (which accelerates heat loss), damaged insulation (preventing the tank from retaining heat), or a malfunctioning burner assembly (your water heater will use more energy but be unable to supply enough hot water).
Are Your Water Heating Bills Increasing?
The cost of your energy bills is another way to assess how efficient your tankless water heater is. Your monthly heating costs should be lower after installing one. However, if your energy bill is increasing with no reasonable explanation, consider replacing the unit (especially if it’s been used for several years and hasn’t had annual maintenance). After all, tankless units are designed to conserve energy and save on utility costs.
Contact NexGen for Tankless Water Heater Repair or Replacement
A tankless water heater can save on monthly energy bills, conserve space, and provide cleaner water than a tank-based model. It can also last longer and qualify you for tax credits. At NexGen, we install natural gas and electric models. Therefore, when it comes to tankless water heater repair and installation, you’ll have a unit that best suits your home. Continue browsing to learn more about our services, maintenance programs, and opportunities to save, or call (833) 729-9735 to request repairs or a consultation.
How Long Does Home Insulation Last?
How long home insulation lasts depends on the material and various factors that can reduce its lifespan. Some materials hold up longer than others. Nonetheless, home insulation doesn’t last forever. If you have an older home or insulation that was installed decades ago, you should consult with a home insulation contractor. Here’s a closer look at how long it may last and when to consider replacing it.
Average Lifespan and Insulation Type
Every insulating material has its benefits and expected lifespan. Therefore, knowing the type of insulation in your home helps determine whether to look into replacing it. Here are some common insulating materials and their typical lifespans:
- Polyurethane Foam: Otherwise known as spray foam insulation, it can last a lifetime. It does not hold moisture, is mold-resistant, and does not move on its own. However, extreme weather, construction activities, or pest infestations can cause problems, resulting in the need to replace polyurethane foam insulation.
- Fiberglass: This cost-effective insulation can last 80 to 100 years unless it’s damaged. But fiberglass batts vary in quality, so they may start to fail after 15 or 20 years. Therefore, schedule an inspection or energy audit if it’s been that long since it was installed. Fiberglass batts should look fluffy, dry, and free of mold.
- Cellulose: Eco-friendly and effective at blocking air, cellulose insulation is resistant to degrading over time. It’s made mostly of recycled materials. Typically, it can last 20 to 30 years but can start to degrade by 15 years. Cellulose is often installed as a supplement to other materials, but if it degrades, you can start to feel the effects.
- Mineral Wool: This durable and increasingly popular form of insulation can last several decades. Various factors can shorten its lifespan. Even if you have longer-lasting insulating materials elsewhere, deteriorating mineral wool can cause problems, especially if other materials are compromised or were improperly installed.
Signs It’s Time for New Home Insulation
Insulation is hidden in the walls, ceilings, and attic of your home. You can’t usually see it deteriorating, but there are signs that suggest it may be time to call a contractor to take a look. Here are some reasons to call:
- The temperature in your home fluctuates or is uneven.
- Your home is always too hot or too cold.
- There are drafts throughout your home.
- Sudden or gradual increases in your energy bill.
- Frequent allergies or illnesses in your household.
- Condensation, high humidity, or frequent water leaks.
- Problems with mice, rats, squirrels, insects, and other pests.
- Ice dams form on your roof in winter.
- Insulation is sagging, shifting, breaking down, falling, or wet.
The location of the signs you notice can point to where the problem is. For example, if your floors are cold, insulation in the crawl space may be sagging or breaking up. If your walls are cold to the touch or surfaces or dishes in kitchen cabinets are cold, have a contractor check the insulation in the exterior walls. Meanwhile, temperature control issues throughout your home or ice dams on your roof indicate an attic insulation problem, which allows warm air from the inside to escape.
Deteriorated insulation can create a wide range of issues. If you can see your home insulation (it’s typically most visible in the attic), it should look fluffy and uniform. Replace it if it’s saturated with moisture, full of mold, has shifted to one side or another, or if it’s formed a big pile in the middle.
What Causes Home Insulation to Deteriorate?
No matter the expected lifespan of an insulating material, it can deteriorate depending on the conditions. It will have to be replaced sooner if:
- Water has leaked from the roof or the roof is water-damaged.
- Temperature fluctuations have caused condensation, which in turn causes mold to grow in insulation.
- The insulation has been punctured or otherwise damaged.
- Dust has built up on the insulation, making it less effective.
- A storm or fire has damaged your home.
- You have an older home that may have shoddy, poorly installed insulation.
- Batt or loose fill insulation was used.
Schedule a Home Insulation Audit or Replacement
Insulation is found throughout your home, including in exterior walls, floors, attics, crawlspaces, basements, foundations, and air ducts. NexGen is the #1 HVAC contractor in Southern California and specializes in installing and replacing home insulation. We can determine where your insulation needs to be replaced and the best insulating materials to use to improve comfort, safety, and efficiency. The right insulation can keep heating and cooling costs under control. To learn more and schedule an appointment, call (833) 729-9735 today.
Types of Professional Drain Cleaning Services
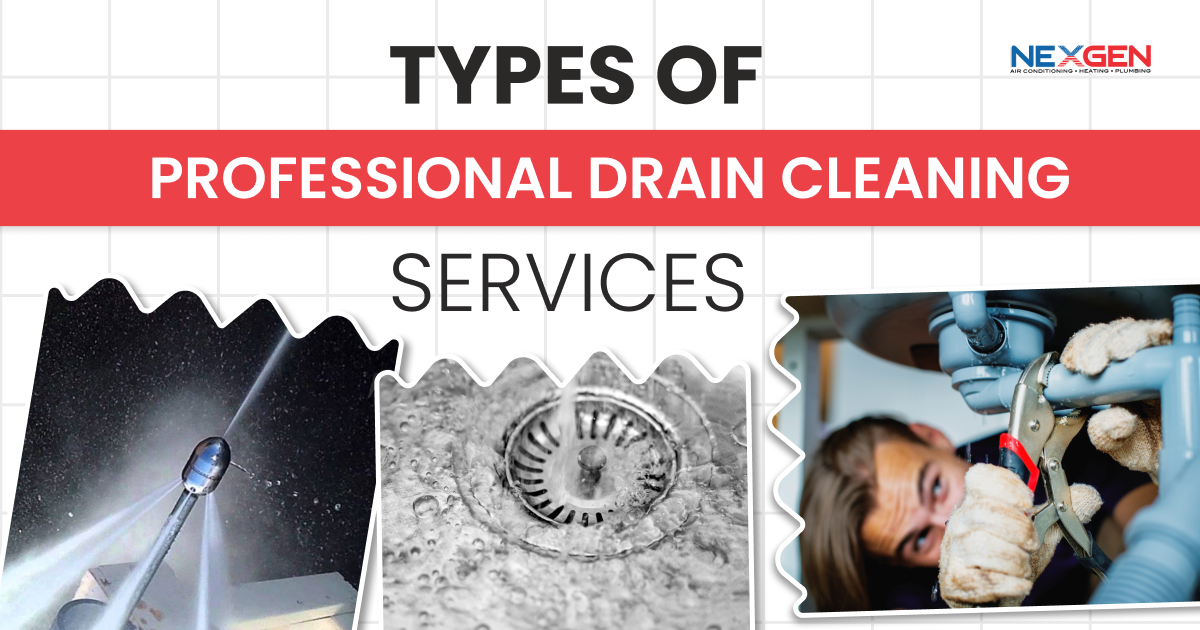
There are different types of professional drain cleaning services to consider. This is important to know when requesting emergency service or routine maintenance and enables a plumber to address a wide range of problems. A clogged drain can occur for various reasons and cause odors, odd noises, and water backups.
When you call a local contractor, a qualified professional can provide drain cleaning services such as:
Video Pipe Inspection
A video camera inspection is often the first step to unclogging a drain. It involves inserting a digital camera and LED light mounted to a fiber-optic cable into the line. The images are transmitted to a monitor so the problem can be viewed onscreen and a technician can determine the nature, size, and location of a clog. By analyzing what they see, the plumber can determine the best method and tools for removing the clog and preventing future issues.
Based on what they see, a technician can move forward with removing an abundance of material that’s clogging the line. Grease or tree roots require different methods to address. If frequent clogs are being caused by a shifting foundation, the associated pipe damage will have to be repaired and other service professionals may be needed to address the problem.
Chemical Drain Cleaning
There are many chemical drain cleaning products on the consumer market. However, many of them can corrode pipes and cause chemical burns on your skin. A licensed plumber has access to more effective products and the skills and equipment to handle such chemicals safely. Professional-grade products are also more effective at reacting with and dislodging organic blockages in drain lines.
Air Burst Drain Cleaning
A drain cleaning service professional can use equipment to accelerate a gas, such as carbon dioxide, to break up and dislodge a clog. Pressurized gas provides enough force to reach blockages farther down the drain. Despite the force of the gas, it does not damage the interior of pipes.
Drain Snaking
A drain auger provides a more traditional method of clearing a drain line. It’s not new but remains a preferred method of attempting to remove a severe clog. The auger head has blades or a screw-like head and is turned via a crank or motor. As it rotates, it cuts through whatever is obstructing the pipe. Some augers can grab onto and pull the material out. While a consumer drain snake may not reach very far, plumbers can use motorized equipment that can reach up to 100 feet or more.
A drain cleaning service that uses drain snaking is often referred to as a roto-rooter service. Both drain snaking and a roto-rooter service are the same thing.
Hydro jetting
A more recently developed drain cleaning service, hydro jetting uses high-pressure streams of water to dislodge clogs and force them through your plumbing system. The material blocking the pipe is pushed into the waste lines and sewage system, while the internal walls of pipes can be scoured clean to reduce the risk of future clogs. A plumber may set the hydrojetting machine to a pressure of up to 35,000 PSI. It can clear food, grease, hair, mineral deposits, and other blockages no matter how long the drainpipe is.
Drain Sewer Cleaning
A blockage can sometimes form inside a sewer line. It requires specialized snake equipment and other tools to clean, but a plumber can often perform sewer cleaning from inside your home or via the clean-out located outside (one can be installed if you don’t have it).
Sewer cleaning is needed when tree roots invade sewer lines. Professional plumbers have equipment that allows them to access and break up tree roots that have infiltrated a pipe. They can also use non-invasive methods to replace affected sections of pipe.
When Should I Call a Professional Drain Cleaning Service?
It’s a good idea to call a plumber to determine which of these services you need if:
- A sink is taking longer to drain
- Water is bubbling up from a drain
- A toilet flushes partially or not at all
- Water backs up in the shower when you flush the toilet
- Foul odors come from a drain or plumbing fixture
Schedule Professional Drain Cleaning Services in Southern California
NexGen has a team of fully licensed and insured technicians who can quickly diagnose and fix any plumbing problem. They’re equipped with the latest tools, including state-of-the-art camera inspection and hydrojetting systems, to get the job done right and prevent issues from recurring. Check back often for featured discounts. To schedule drain cleaning services and receive a free quote, call (833) 729-9735 today.
How to Pick the Best Air Conditioner Installation Contractor

Picking the best air conditioner installation contractor can be a challenge. There are thousands of AC contractors in California. Not all are qualified to meet your needs. Only with the proper expertise and equipment can an installer ensure a system will work safely, reliably, and efficiently. However, you can take a few steps to find the right air conditioner installation company.
Working with a professional AC contractor is important for many reasons. It ensures your safety and well-being as air conditioner installation is a delicate process. A dependable cooling system is also an investment; when correctly installed, it will keep your household comfortable for many years.
That being said, here’s how you can find a qualified air conditioning installer:
Know What You Need a Technician For
Gather basic information you can provide a contractor when you call them, such as:
- The make and model of your AC system
- The date it was installed and last serviced
- The square footage of your home
Knowing the company that installed and serviced the unit can help. At the very least, it will provide the new contractor with some useful details. Or, you can try contacting the original installer if it’s still in business.
Ask Someone Who Knows
If a family member, friend, colleague, or neighbor has previously recommended a home services company, and you weren’t disappointed, ask if they’d recommend an AC installer. You can also try contacting local trade organizations. They can provide you with names of members that meet their standards. Once you have a list of company names recommended by a trusted source, you can begin your research.
Read Online Reviews
If all else fails, online reviews are abundant. You can find them by using search terms such as “best air conditioner installation contractors near me” or “AC installation in Los Angeles”.
When reading reviews, look for write-ups on the type of installation you need. A negative review here and there doesn’t necessarily disqualify a contractor. The reviewer’s home and installation requirements may have differed completely from yours. For example, they may have dealt with incompatible equipment or an outdated duct system that had to be replaced. Or, they may have unreasonably expected the contractor to replace a part that was no longer available.
Therefore, if you want to update to a more energy-efficient unit or a zoned AC system, look for customers who have hired the company for such services.
Check Licenses and Certifications
A contractor must acquire a license from the state of California. To become licensed, a technician must complete an HVAC educational program and on-the-job training and have at least four years of journeyman-level experience. Other credentials a contractor should have include North American Technician Excellence and U.S. Environmental Protection Agency (EPA) certification.
Don’t Go for the Lowest Price
You won’t necessarily receive the best quality service. Always check what you’re getting for the quoted price. If the company provides subpar service, cuts corners, or uses lower-quality equipment/materials, you’ll pay more later for repairs or an early replacement. Exceptional service may cost more upfront but will save you in the long term. However, asking about special offers and rebates is a good idea.
Evaluate a Prospective Contractor’s Quality of Service
To evaluate an air conditioner installation contractor’s quality of service, look at how they handle their process. For example, you should look for the following in a reputable AC installer:
- Home Evaluation: The contractor should visit your home and determine its square footage, the number and location of windows and doors, and other variables to decide on the right type and size of AC unit to install.
- Itemized Written Estimate: Get every estimate in writing. A verbal agreement is not enough to ensure you receive top-quality service. It’s a sign of an inexperienced technician. Ask for an estimate in writing that includes every aspect of the project, including the AC model, its cost, efficiency, and warranty.
- ENERGY STAR Equipment: Look for an AC installer that provides ENERGY STAR products. These meet the latest energy efficiency guidelines and have the potential to yield the most significant long-term savings. The contractor should calculate the potential savings of any equipment they suggest installing.
- Communication Skills: Any air conditioner installation contractor should be eager to answer your questions. They should possess a professional demeanor and explain every option and step of the process. A contractor’s primary goal should be to ensure the customer’s satisfaction.
Ask Questions
Before hiring an AC installer, ask how long they’ve been operating, whether they’re licensed and insured, and what training and qualifications their technicians have. Also, ask about warranty details and if they work with an AC brand you prefer. Inquire whether you’ll be billed for the estimate as well. A free estimate saves you money if the contractor cannot install a unit that meets your needs or you’re not satisfied with their quote or quality of service.
Contact NexGen for High-Quality Air Conditioner Installation
NexGen is a leading AC installation company in Southern California. We help customers decide on a new system and safely and correctly install the latest, high-efficiency ACs. You can benefit from lower energy bills, reduced maintenance costs, and increased comfort and indoor air quality. For help determining the best system for your home and to request a free quote for air conditioner installation, call NexGen at (833) 729-9735 today.
Cost of an Electrical Panel Upgrade: Is It Worth It?
According to Forbes, the average cost of an electrical panel upgrade is $1,800 (as of 2023). However, you can spend $5,000 or more depending on various factors.¹ To help you understand if the cost is worth it, we’ll explore these factors and some benefits of updating your electrical panel.
The cost of an upgrade is largely determined by the new panel’s amperage rating and labor costs. An electrical panel links your home to the utility grid and supplies electricity to every branch circuit. Therefore, it must meet your electrical needs, while functional circuit breakers cut power if there’s a fault or overload to avoid major damage and fires.
Therefore, an electrical panel upgrade increases capacity and avoids many hazards. But its cost is impacted by the following:
Capacity
The electrical panel’s capacity will ensure it meets your home’s power needs. If you have an older 60-amp panel, high-power appliances can overload it. The most common amperage ratings for new electrical panels include:
- 100 Amps: The panel may cost $100 to $200 but with labor, the total price averages $850 to $1,450. This size is suited for smaller homes or a property with modest power requirements.¹
- 200 Amps: If your home has a higher electrical demand, you’ll need a 200-amp panel. It costs $250 to $350 and ranges from $1,280 to $2,700 with labor to install the panel, wiring, and breakers.¹
- 300 Amps: The equipment costs $350 to $500 and, with labor, cost estimates range from $2,000 to $5,000. A 300-amp panel is suited for a larger home and requires making significant changes to your electrical system.¹
- 400 Amps: Intended for very large homes with high power demands, a 400-amp panel can cost $3,800 to $7,000 to install considering labor and the need for specialized breakers and heavy-duty wiring.¹
Panel Location
Relocating an electrical panel to another room or outdoors can add $1,000 to $2,700 to the overall project cost.¹ That’s because substantial electrical and other infrastructure changes will be needed in addition to replacing the panel.
Age/Condition of Your Existing Electrical System
If your electrical system was installed less than 25 years ago, you may not need to replace the main panel. Adding a subpanel to increase capacity may be possible. A subpanel can be installed for $400 to $2,000.¹
Cost of Parts
Depending on the age and condition of the panel and the system, you may have to replace wiring, circuits, and receptacles, which increases the cost of the upgrade. Replacing a circuit breaker switch ranges from $100 to $200 (each costs extra on top of the price of the service panel). A meter box is another component that may need to be updated. It must be installed by the electrical utility company and costs $100 to $500.¹
Labor
Installing an electrical panel requires a lot of work and experience. The quality of the work is as important as the quality of the equipment. Insecure wiring, installing the wrong-sized wires, choosing an improper wire length, or loose connections can cause a wide range of problems. Therefore, consider the cost of labor a sign an electrical contractor is focused on getting the job done right.
Is an Electrical Panel Upgrade Worth It?
While an electrical panel upgrade can be costly, it’s worth it if your current panel isn’t meeting your needs. The panel should be replaced if you’ve installed new appliances, such as a convection oven or hot tub. Also, consider an upgrade if it’s not working properly.
If you reset the circuit breakers often, hear sizzling or buzzing sounds from outlets, need to unplug appliances to use others, have flickering lights, or have high electricity bills, updating your electrical panel is a good idea. Also, replace it if it’s hot to the touch, smells like smoke, is rusty, or is visibly damaged.
An electrical panel upgrade also comes with these benefits:
- Safety: The new panel can protect your home from electrical fires and prevent shocks or burns when using outlets or appliances.
- Protection Against Electrical Damage: An outdated electrical panel, even if it’s not faulty, can damage newer appliances and electronics if it can’t handle the power demand.
- Increase in Home Value: An electrical panel upgrade is worth it when you consider the potential increase in property value; your home will be safer, more functional, and have an electrical panel that can last 20 to 30 years, so it can be more attractive to a potential buyer.
Contact NexGen to Schedule Your Electrical Panel Upgrade
Our licensed electrical technicians upgrade electrical panels in homes across Southern California. We help increase capacity to support high-power appliances. Whenever possible, we can repair your existing panel, but recommend having at least a 200-amp unit to ensure your home and family are safe. You can also save on routine maintenance and emergency calls with our X Protection Plan. To request an electrical panel upgrade or receive a free quote, book an appointment online, contact us directly, or call (833) 729-9735.
Source:
- https://www.forbes.com/home-improvement/electrical/electrical-panel-replacement-cost/
Should I Install a Nest Temperature Sensor?
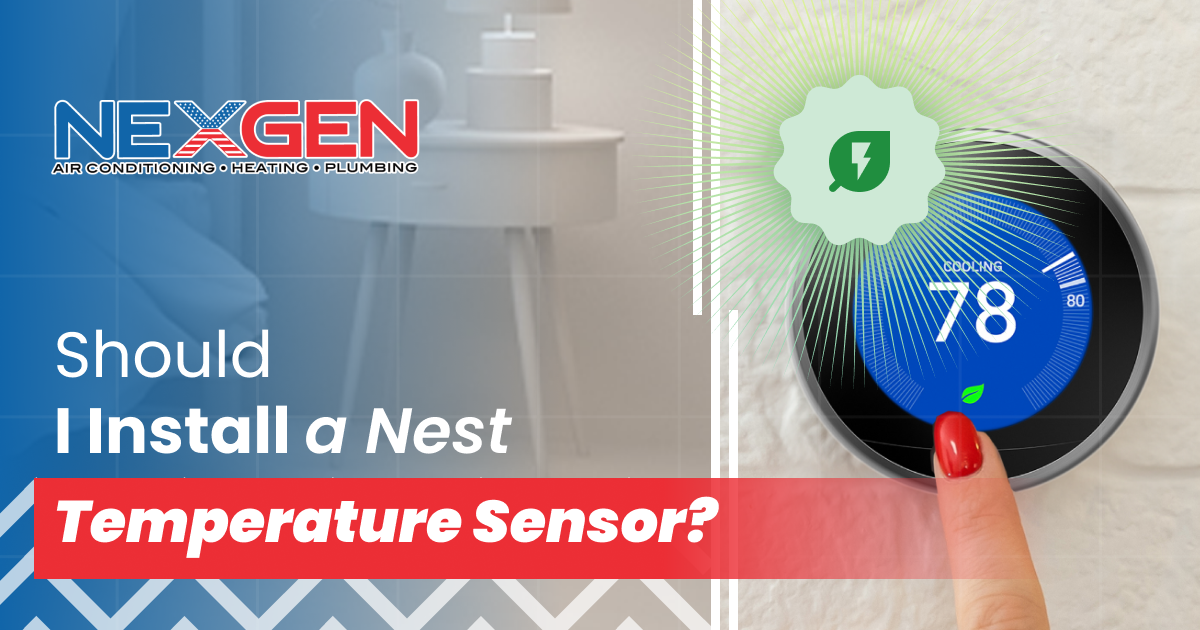
A Nest Temperature Sensor is the ultimate solution to achieving climate control for the room you need to be heated or cooled. In most homes, the temperature in each room differs. It can vary depending on room size, exposure to sunlight, and other factors. The Nest Temperature Sensor communicates with the desired thermostat to ensure your comfort. We’ll explain a few reasons why you should consider installing one.
It Takes the Load Off Your Thermostat
The sensor takes readings and relays the temperature of the room where it's placed to the thermostat. The thermostat then turns the system on and off based on the sensor’s readings rather than its built-in sensor. From the app, you can choose which sensor controls your thermostat. You can also control which sensors control which thermostat based on the time of day.
Scheduling Functions
To use the sensor, you need a Nest Thermostat. It includes a Time-to-Temp feature that can estimate how long it’ll take to reach a set temperature. Meanwhile, the Early-On function calculates the length of time it will take to heat or cool your home. Therefore, the sensor can turn the AC or heater on when you leave work, so your home will be at the perfect temperature when you arrive.
A Long-Lasting Battery
The battery in a Nest Temperature Sensor can last as long as two years. The Nest or Google Home app will alert you when the battery is low. You’ll also receive a notification on your phone. Once the battery is critically low, the system will notify you again, so there’s ample time to replace the battery before the sensor shuts off.
Multiple Sensors Can Be Installed Per Zone
If you have a zoned HVAC system, up to six sensors can connect to a single thermostat. As many as 18 sensors can be added to the entire system. Using the Nest app, you can select the appropriate sensor to cool or heat your living room, home office, or bedroom.
Nest Temperature Sensors Are Accurate
The algorithm used by the Nest Thermostat is based on real-world data. It’s also updated regularly to improve accuracy. The sensors only measure indoor temperature, but the system can connect to the internet to obtain information on the temperature outside. You’ll have to specify your location when setting up the sensor.
Each Sensor Is Easy to Install
Google provides simple instructions for installing each sensor. Add it to your account by scanning the QR code on the battery pull tab, and then remove the tab. Install the unit about chest high and within 50 feet of your thermostat to maximize accuracy. Make sure it’s not near a heat source or where airflow is blocked.
You can mount the sensor on a flat surface like a shelf, or you can mount it on a wall. The included screw can usually be installed without drilling a pilot hole. Simply hang the sensor by fitting the screw hole on the back of the unit over the screw in the wall.
A Nest Temperature Sensor Can Save You Money
Accurate temperature readings from each room, the ability to control your thermostat accordingly, and schedule heating and cooling can make your HVAC system more efficient. Your home will feel more comfortable, yet your energy bills should be lower. Many of the benefits will be immediate, and the potential for long-term savings is a great reason to consider installing a Nest sensor. Plus, you can eliminate temperature fluctuations around your home without costly modifications to your HVAC system.
Contact NexGen Today
NexGen specializes in improving the comfort of homes throughout Southern California. Let us assess your heating and cooling system to determine your best options. A Nest Temperature Sensor can make a big difference. We can install and set up the system (including the sensor and thermostat) for you. To learn more and request service, call (833) 729-9735 today.
A Complete Guide to Indoor Air Quality Testing
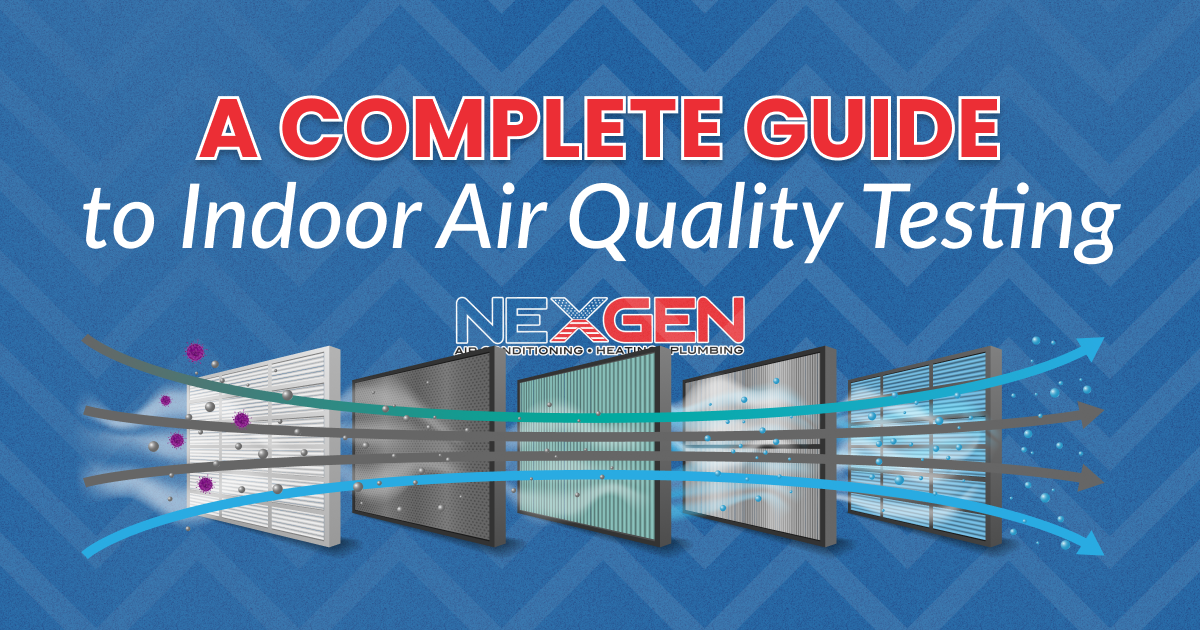
In this guide to indoor air quality testing, we’ll look at the different contaminants that may be in the air you breathe and how to find them. These can include dust, pollen, mold, particulates, and volatile organic compounds (VOCs). Poor indoor air quality (IAQ) can affect your comfort and health, but knowing what’s polluting your home can help find solutions. Here’s a closer look at indoor air quality testing and the options available.
Know the Signs of Poor Indoor Air Quality
There are far too many pollutants to test for all at once. But various indicators can point to certain IAQ issues, so start by recognizing these signs of a potential issue:
- Health Symptoms: Coughing, congestion, and other respiratory symptoms are the most common issues associated with polluted air. Eye, nose, and throat irritation can also point to a problem. Other signs of bad IAQ include headache, dizziness, nausea, confusion, and fatigue.
- Poor Ventilation: If there’s reduced airflow from HVAC vents or your home seems stuffy, check for musty odors that can indicate mold is growing or for condensation on walls or windows.
- Aging Home: Older homes often contain materials that can emit VOCs and have persistent ventilation issues. They may have also been constructed before modern building codes were introduced.
Schedule professional IAQ testing if any of these issues are familiar to you.
Types of Testing
Aside from what to test for (which we’ll discuss soon), there are different types of IAQ testing to consider. Some methods can check for several pollutants; others are intended to check for a specific contaminant. These are the most common methods used:
- Ambient Air Quality Testing: Measures the types and levels of pollutants outside your home to identify potential sources of pollution.
- Indoor Air Quality Testing: The level of pollution inside your home or office is measured along with the risk of exposure to harmful substances.
- Particulate Matter Testing: This can determine the concentrations of dust, smoke, and other minute particles and help find ways to address the problem.
If there are pollution sources near your home contributing to IAQ concerns, source testing or stack emission testing can be performed at specific locations, such as industrial facilities. Mobile source testing measures pollution from vehicles and other modes of transportation. These methods can help find ways to reduce the risks and amount of pollution in your home.
IAQ Monitors
An indoor air quality monitor is a simple and inexpensive way to determine if your home has any IAQ problems. Depending on the model, it can measure temperature and humidity or toxins in the air (via electrochemical sensors). Some units can estimate the level of particulate matter using a laser or volatile organic compounds from building materials such as carpeting. An IAQ monitor may determine the Air Quality Index (AQI), a measurement devised by the U.S. Environmental Protection Agency (EPA) to determine the health risks of outdoor and indoor pollution.
Carbon Monoxide Detectors
Carbon monoxide (CO) is odorless and colorless but can cause sickness and death. It has many sources, including malfunctioning heating systems. Required near bedrooms and on every floor of your home, a CO detector should be placed wherever there’s a smoke detector (some units combine both functions) about 5 feet above the floor or near the ceiling.
Mold Testing Kits
Various types of mold tests are available. Swabs and tape strips allow you to collect samples from surfaces. Some swab tests yield results in minutes, although they won’t reveal the type of mold. Tape strips and petri dish tests must be analyzed in a lab. Nonetheless, contamination by other particles can skew the results. An air pump test is closed off and less likely to be contaminated.
For the most accurate mold testing, hire a professional if you think your home is infested.
Radon Testers
Found naturally in soil and rocks, radon gas can seep through tiny cracks in your home’s foundation. High levels can have long-term health effects, including cancer. But radon testing takes time. Depending on the test, it can take 90 days to several months, and even then, a lab must interpret the results. You can also install a continuous radon monitor that will alert you if levels get too high.
Know What Is Polluting Your Home
Indoor air quality testing can identify pollutants such as pollen, mold, or dust. Tobacco smoke and fuel combustion sources can severely reduce IAQ. But there may be many pollution sources you don’t know about. For example, aerosol sprays, paints, pesticides, disinfectants, scented candles, dry cleaning, and manufactured furniture can contain harmful compounds and contribute to pollution inside your home.
Hire an Indoor Air Quality Testing Professional
At NexGen, our licensed professionals can test for VOCs, mold, carbon monoxide, and other contaminants. We are Google Certified for Home Services. Our team can identify and address IAQ issues in your home or business. For fast and accurate indoor air quality testing and proven solutions, call (805) 301-6788 today.


